Here's my tag from 2009

...and this year's tag

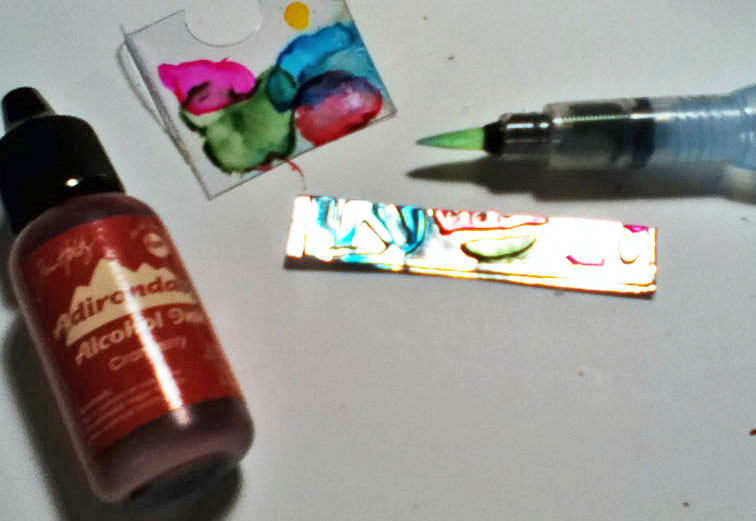
I'm going to show you how I created this look using one of my scraps of foil. Like I said yesterday this is a good way to test things. I had planned on using alcohol inks and then painting over it and doing a wipe away with pearl white paint. However, when I tried it the alcohol ink came off completely too. oops! and I was glad I took my own advice and tested that first on a scrap! I used the new Martha Stewart Craft paint but a friend said she has used cheap black craft paint and it's worked for her. definitely a time to test if you have the right craft paint for the job if you decided to go that direction.
Step one:
paint embossed foil using an H2O brush filled with alcohol ink blending solution. you can also use a small synthetic paint brush. just make sure to rinse it well in blending solution
Step two:
using a white Krylon paint pen (or white paint and a brush) apply white paint to the desired debossed areas.

Step three: if you use the krylon style of paint pen (this is oil based paint) the paint will stay wet for a few minutes giving you time to apply clear iridescent glitter in sections as you work. sprinkle and press into the paint with your finger. it will adhere immediately. if you use craft paint you may need to apply glossy accents and then glitter.

Step four: sand top surface of the tag (if you opted to use craft paint and glossy accents you may need to wait for it to dry before sanding)

Step five: ink a foam blending tool using walnut ink and add a bit of "dirt" to your tag. you can add some soot too if you want. I grabbed my Versa Magic Black Magic because it is an opaque black ink much like real soot. whereas the "black soot" colored Distress ink ironically, is translucent on foil. LOL

Step six: this is where I skipped adding embossing powder over the entire thing and opted for just sealing it with a *VERY* light coat of Krylon Preserve-it!. (TIP: this is a time when you may want to test on a scrap piece of foil again! the alcohol inks got tiny spray dots in it. i loved the look. almost like when you flick water onto Distress inks. you may have different results through so test it. if you want to skip the spray you can certainly do the embossing as Tim did).
*as a side note this little can of Krylon is a great size for the craft room. it's just enough for small jobs you can sit down in your trash can or a box, and spray. it IS stinky though!

Here is a close-up of the surface of my tag.

Step seven: To finish it off as shown above, I trimmed foil tape with scallop scissors to resemble the top of a vintage ornament. I then edged the tag in it (wrapping the excess around the back) to take away the sharpness of the foil edge.

I found a vintage buttercup light (I say that like I *don't* have boxes and bins of misc things stashed away for these tags LOL) and wrapped it with some craft wire making a little charm for my tag. The star is a vintage metal stud I attached to an old 7 gypsies clip which is very similar to Tim's clips. ;)
* yes I had a bit of a casualty tonight. the radiator ornament was in my possession less than 24 hours before I managed to break it by dropping my camera on it. I really wanted to kick myself as it was the inspiration for the tag to begin with. (I will be saving the pieces for a xmas inspired configurations box though. I have a couple good pieces from it that will look great in there.)
Really like the colors you used and the overall effect.
ReplyDeleteSMART GIRL!!! I love this one even more than the one you did last time and yesterdays tag scared me too. Lara went her own way too and it was better. I totally love the white silver frosty look of this one. Its more of a vintage ornament look.
ReplyDelete