May 7, 2012

Set Sail!

Hope everyone is enjoying the Melody of Life mini collection as much as I have! I have noticed it flying off the shelves online so you must! :) There is probably a bit left out there if you look hard enough. Took me some time to find the perfect project for it. I wanted something I'd hold onto for a while and display in my home since the colors matched so well. If you have family that are musically inclined and need some paper that doesn't pigeonhole you into only using Red/Black/White color combos, check this one out.


I enjoy turning trash to treasure and this project was certainly a good one! My neighbor called me and said she had some things she wanted to get rid of, to come take a look. I found a couple things for our beachy/mermaid bathroom and in the pile of stuff was a (broken) Jim Shore resin sailboat that (I hope I don't offend anyone, LOL) was quite hideous. Really the sail was the most awful green for this sculpture. This photo doesn't even do it justice. It was VIBRANT, but it had "good bones". It sat on my kitchen table for a good week. I almost tossed it twice before this idea came to me. ;)


I'm sure you see where this is going! I decided to cover it with paper! and what fun it was molding and sculpting the boat and sails into a whimsy of life on the high seas. 


So glad I didn't toss it because this is probably one of my favorite projects recently. You are probably wondering what music had to do with sailboats right?? Well I think it is safe to say I was thinking out of the box with this one. (recycled paper mache xmas gift box to be exact.) None the less it works great and the quote ties it all together. The quote from the journal card sheet was cut with a spellbinder's die and safety pinned to the sail over the word "listen". I layered and pop dotted the same word from the sticker sheet onto it.


Thanks for looking!

February 6, 2012

Yours Truly Blog Hop

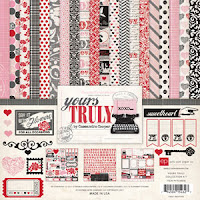
Anyone else behind in creating Valentine's Day decor and cards? I know I sure am but you still have time to place an order or stop by your LSS and pick up some new papers to inspire you! If you haven't had time to check out the Echo Park line Yours Truly, let me give you a little peek into the paper collection that was voted Number 1 by all of YOU!


There is sooo much more in this collection than just Valentine's Day themes though. Don't for one second think you will use it for just that alone! If you don't believe me just check out all the themes in this newsprint paper. ;) Go ahead, I'll wait....


Lots to chose from that is still lovely but not totally Valentine's Day related either huh? I went the obvious route of course but if you follow the blog links at the bottom of this post you will be in for some surprises as far as the variety of themes others have used theirs for. Christmas? yup! 

I have been thinking about creating one of these for a while. I saw something similar online ages ago. Of course it was before Pinterest so it's only saved in my head. LOL The Center of the rosette is made using an old photograph I found *JUST* for this purpose while shopping at a local thrift store with a friend. It is a very old (1873?) photo of a child dressed as a Cupid holding a bow. I thought it was just perfect. I'll be sharing that image in a moment! It is layered under a vintage glass clock face cover so it is convex and gives a little space for some embellishments under it. perfect right?


The rosette is made up of many layers attached from the back side and built up between layers of chipboard. this is a perfect use for cereal boxes as the print will not show. just make sure you cut it about 1/2" shy of the edge of your previous layer. Working from smallest to largest.


How cute are these little XOXO banners?


And last but not least the center of the rosette with the photograph! and as promised the printable image so you can have fun creating with this sweet little girl.


Looking for more ideas?
Check out these other blogs in the hop! And stay tuned for some late additions ;) 

Nancy Burke-Coming soon!
Denise Thorton-Coming soon!

If you are looking for yet even MORE inspiration. Echo Park has put together a digital eBook which you can download  as a pdf file. So many options for reading a PDF now.  read on your PC, Kindle, or even a Kindle App if you are lucky enough to have an Apple device*. :) 

(*My new iPad2 is patiently waiting in it's box for me to finish this post eeeeeek!! Happy Valentine's Day to me! Love my husband sooo much!) 


Have fun crafting!!

January 16, 2012

DIY Apothecary Cabinet

If you have a half dozen or so various sized iris carts and hate looking at their utilitarian plasticness, this post might be for you! Sure those carts and towers of drawers are handy but they don't look very nice. Since my room is essentially open to the entire upper level of my house (and even seen by some of the lower level) I have been looking for "prettier" storage. which led to a need for a set of card catalog drawers or an apothecary of some sort. Only without the steep price tag.

I came across many great mail cubbies  like this


...and realized they were essentially the same as a shoe organizer like this ClosetMaid 25 cube cabinet


but I wasn't loving the idea of all the "mess" showing, and this made me think hmmm maybe I can make my own drawers! This drawer (below) reminded me of the old berry flats with the pine ends and cardboard sides/bottom. And right there an idea was born. :)


I started with two 25 space shoe organizers from Lowe's. these are not cheap so if you can find  1-2 used cabinet bases you could save a good chunk of money (Like $100!). two of them stacked without legs are about 5'4" tall. I had plans to add feet and a cown moulding piece to the top which would look GREAT, but I'm short LOL! Adding another 6-8" would mean the top drawers would not be as accessible so I went without feet/topper.

Here's what I ended up making and how:


I started with assembling the cabinets above and measuring the cubbies for my drawer size. then began creating the drawers. each drawer needed a 1/2" thick plywood front and back cut slightly smaller than the cubbie openings and just deep as the cabinet itself you want to take into account the thickness of the cardboard you use to create the sides and bottom of the drawers when calculating the width and height of the plywood pieces. (* you'll see what I mean later)

I was lucky to have a Dad that would help me cutting all 100 fronts/backs using his table saw. ;) if you don't have a super handy Dad (or Husband! Mine got out of all the work because he was deployed and I couldn't wait any longer. :) ) Home Depot will rip plywood into board feet for you. (they just need to know the width you want.) then all you will need to do is cut to length with a chop saw. when we were done Dad drilled all the holes on the drawer fronts for the knobs, while I sanded the edges as needed.  this only took us a couple hours believe it or not! I even used up some of the scrap plywood we had taking up space in the garage so I saved a bit of money there.

while we were at it I had him cut me a template out of some salvaged acrylic. I used this for cutting the cardboard to the perfect size.  Just like a quilting template I cut around the outside of the template to get a plum cut which made perfect drawer "bellies".
using the template as a straight edge I creased the bottom corners of the drawer so they would wrap around the drawer fronts/backs forming the sides and bottoms of the drawers like a "U". I stapled in place with a heavy duty staple gun and 5/16" Light Duty Staples.

*a friend recently told me she and her DH used a table saw to cut down stacks of cardboard and the edges were "ok". might be an option if you want to try because I won't lie. cutting 50 sheets of cardboard took me a few nights to get through. I longed for the days of working in a picture framing gallery and having a wall mounted cutting system!

Before adding the sides you can decorate the drawer fronts by decoupaging scrapbook paper, wallpaper or old salvaged paper to them. I painted the fronts of mine white but later realized it might not have even made a difference.   Your drawerwill look like this when you wrap the cardboard piece around the belly and sides of the drawer.


 *the overall exterior size of the drawers is 11.5" deep (long) X 5 3/4" tall X 4 3/8" wide. 


In my case I had a ton of used priority mail boxes from post CHA shopping this fall and a reorganization of my scraproom (I had kits stored in them). these boxes have very thin but strong construction and are the perfect material as they barely show when the drawers are closed. You can get two drawers worth of cardboard out of one box if you are careful to peel it apart at the side seams to open it up instead of cutting it open.


For the knobs I purchased plain wood knobs from an online bulk sales company and painted them white. once dry I stamped with black archival ink using various stamps I had on hand.

The label plate is a Tim Holtz Die cut from heavy chipboard and black cardstock layered on top. I used watercolor paper for the label backing so pencil marks would erase easily if I wanted to put something new in a drawer. I attached them with my ATG. The brads on each end of the bookplate are purely decorative as is the enameled number plates on some of the drawers.


The drawers hold a lot of supplies. that lower right drawer has a full sized glue gun, two minis, a container of two bags of bulk large glue sticks and a few more colored sticks on top there. Since the cubbies are big enough to hold shoes you get twice as much room in here than a Library card catalog would allow. That's a HUGE bonus for me and was worth the effort to make this on my own over buying.


And then after I was all through making the cabinet, the idea came full circle when I found this on etsy (or ebay?). I realized someone else had used this same idea using tin formed around two pieces of lumber a long long time ago. LOL
One of these cabinets would look great with all sorts of salvaged knobs and pulls like this hardware drawer had on it.


Cost
2 ClosetMaid cabinets $45 each =$90
Scrap 1/2" plywood = free 
(* it'about $15 for a sheet)
Wood knobs w/ screws $20
Priority Mail Cardboard boxes = free
5/16 light duty Staples= $5
----------------------
Total
$115


You can follow a discussion about the process and additional solutions for drawers at Two Peas 
December 18, 2011

From the North Pole

Thought I would share some quick tags I did at 5am this morning. What else was I going to do at that time on a Sunday morning? LOL I tried checking for the paper but it had not even been delivered yet.
I put these together using the following dies:

Sizzix Originals Die Set - Large Tags, Scallop Combo #2

Sizzix Movers & Shapers Die - Carved Ornaments #2

Spellbinders Shapeabilities Dies, Ribbon Banners.

The "Happy Holidays" stamp was from the very old Making Memories magnetic stamps. ;) Yup I still use mine from time to time. they have wonderful tiny little images and words.

And my good old Krylon 18kt gold leafing pen! this is perfect for this die because it cuts out the toppers and the ornament from the same sheet. I just color it with gold or silver Krylon pen and I'm all set to glue it together.

The best part about these tags is that they can be used TWICE (or more!) the small tag can be written on this year and ripped off while you are cleaning up the piles of wrapping paper. That person who is always saving the bows from gifts will get an extra treat this year. ;) Whether that is you or your Holiday hostess! Just remove that small white tag and write on the back of the ornament next year.

December 11, 2011

Tim Tags Day 9


I'm skipping a day and will come back to this at the end. ;) Just wanted to mark my spot in order and let you know you I will be doing it later. Here is the tag Tim completed.

Tim Tags Day 10


Went a new direction here for a few reasons. First I really wanted to use this stamp I bought from Hero Arts called Musical Collage. I just love the background and the bird on it so much. it needed a tag! at that point I was still planning to stick to Tim's colors and techniques overall. except when I made my packing tape transfer of the Santa to go behind the fragment it came out very faded. not sure if I rubbed too much paper off (it was burnished on very well ahead of time so that wasn't it.) or if it could have just been the tape I was using. I've done these a dozen times before and gotten similar results though. To be honest my paper stack to begin with was not as *vibrant* as Tim's stack of papers were either. so maybe a printing issue? or a photoshop issue? I'm not sure. but you can see my Santa had more of a faded merury glass sort of feel to it.

Plan B...I fell in love with this tag I pinned on Pinterest the other day. beautiful palette of colors and embellishment choices. I have been itching to do more shabby chic style tags (I WILL get to them before xmas, hopefully lol) and just decided to go with it. faded Santa and all!


I inked the background using Distress inks Tumbled Glass, Spun Sugar and Shabby Shutters. Layered on the cut out dimmensional bird from the background using foam tape for dimension over the twig of mini Balsam fir (another miniatures craft Dept item), and covered everything with a bit of sparkle. (Sparkle shimmer spritz by Tsukineko, Krylon 18kt gold leafing pen, Diamond Stickles, Martha Stewart Pearl Paint, and clear German Glitter Glass applied with glossy accents.)

*Did you spot the old Heidi Swapp pink plastic letters on my banner? I love this font and hoard those little things. I have a couple other sheets of colors and fonts but that pink one is by far my favorite. aaaannnnd... I just realized I forgot to add glossy accents on top of the letters along with white paint on my banner. :P oops.


A side shot of my fragment. you can see the scalloped foil edge I applied using foil tape cut with scalloped scissors. I demonstrated this on Day 6 when I used it around the outside edge of my mercury glass inspired tag.


Just two more reveals to go!

December 9, 2011

Tim Tags Day 8


the tag today was great but I saw the watch cases at the bottom of the post and knew I needed to do a Polar Express themed tag.


I used the watch faces embossing folder and embossed the tag. then swiped versamark ink over just the raised surface and used white embossing enamel. heat set and then inked with Distress inks in faded denim, chipped sapphire covering the entire tag. then came back with black soot just around the edges which actually just darkens the sapphire to a deep navy. I was wanting to replicate the dark snowy backdrop from most of the movie. Inside the pocket watch case is a watchface set to midnight (when Santa leaves the North Pole) and a silver globe (earth) as well as a snowflake. There is even a tiny little brass tag with the word "express" stamped in it. (a vintage find I have had since 2001!) The vintage "admit one" tag is sprayed with gold shimmer to replicate the gold ticket for the Polar Express.


Tim Tags Day 7

a little behind here. I had to take a different direction on this one. Didn't have the product Tim listed so I went with a postcards and parcels theme.


*Die used is a spellbinders poinsettia. I inked with alcohol ink but wasn't happy with the dark color the red took on from the Kraft glassine. So I reheated it and painted it with luminArte Garnet while still warm (otherwise it beads off).


December 6, 2011

Tim Tags Day 6

Decided to go a different direction but may revisit Tim's technique again after seeing this tag on Pinterest. I was really skeptical of the paint technique going with my style. I decided to revisit the Day 10 tag from 2 years ago, using alcohol inks over the foil base. I loved this tag but it kind of sticks out from all the previous years. I had been wanting to do some more mercury glass looking tags for my collection and thought this was a perfect time.

Here's my tag from 2009


...and this year's tag


I'm going to show you how I created this look using one of my scraps of foil. Like I said yesterday this is a good way to test things. I had planned on using alcohol inks and then painting over it and doing a wipe away with pearl white paint. However, when I tried it the alcohol ink came off completely too. oops! and I was glad I took my own advice and tested that first on a scrap! I used the new Martha Stewart Craft paint but a friend said she has used cheap black craft paint and it's worked for her. definitely a time to test if you have the right craft paint for the job if you decided to go that direction.

Step one:
paint embossed foil using an H2O brush filled with alcohol ink blending solution. you can also use a small synthetic paint brush. just make sure to rinse it well in blending solution between each color. I put a drop of alcohol ink on a piece of transparency from yesterday and used that as my palette. lift the ink from there and apply to the foil.


Step two:
using a white Krylon paint pen (or white paint and a brush) apply white paint to the desired debossed areas.


Step three: if you use the krylon style of paint pen (this is oil based paint) the paint will stay wet for a few minutes giving you time to apply clear iridescent glitter in sections as you work. sprinkle and press into the paint with your finger. it will adhere immediately. if you use craft paint you may need to apply glossy accents and then glitter.


Step four: sand top surface of the tag (if you opted to use craft paint and glossy accents you may need to wait for it to dry before sanding)


Step five: ink a foam blending tool using walnut ink and add a bit of "dirt" to your tag. you can add some soot too if you want. I grabbed my Versa Magic Black Magic because it is an opaque black ink much like real soot. whereas the "black soot" colored Distress ink ironically, is translucent on foil. LOL


Step six: this is where I skipped adding embossing powder over the entire thing and opted for just sealing it with a *VERY* light coat of Krylon Preserve-it!. (TIP: this is a time when you may want to test on a scrap piece of foil again! the alcohol inks got tiny spray dots in it. i loved the look. almost like when you flick water onto Distress inks. you may have different results through so test it. if you want to skip the spray you can certainly do the embossing as Tim did).

*as a side note this little can of Krylon is a great size for the craft room. it's just enough for small jobs you can sit down in your trash can or a box, and spray. it IS stinky though!


Here is a close-up of the surface of my tag.


Step seven: To finish it off as shown above, I trimmed foil tape with scallop scissors to resemble the top of a vintage ornament. I then edged the tag in it (wrapping the excess around the back) to take away the sharpness of the foil edge.


I found a vintage buttercup light (I say that like I *don't* have boxes and bins of misc things stashed away for these tags LOL) and wrapped it with some craft wire making a little charm for my tag. The star is a vintage metal stud I attached to an old 7 gypsies clip which is very similar to Tim's clips. ;)


* yes I had a bit of a casualty tonight. the radiator ornament was in my possession less than 24 hours before I managed to break it by dropping my camera on it. I really wanted to kick myself as it was the inspiration for the tag to begin with. (I will be saving the pieces for a xmas inspired configurations box though. I have a couple good pieces from it that will look great in there.)
Related Posts Plugin for WordPress, Blogger...